Showing posts with label sandra. Show all posts

Sunday, May 15, 2011

"WHERE'D YOU GO?!"

That's probably what you guys are asking. Well, I have almost literally gone nowhere, and I am now officially making my return to my 365 Challenge.

I owe you guys 32 photos, but today I will only post a few that I took over the long hiatus. Sandra and I have decided that it would be best to tack the days onto the end of the year instead of posting all of the photos I took or neglected to take since (1) I must definitely say I did NOT take a photo every single one of those days, though I did take one most of them, and (2) I have been extremely sick, and by the time I get well enough to make up for the missed photos, I will have a ridiculous amount of photoshoots to work on.

Let me catch you up a little.

Ursa has finally stopped looking for Roxy and now spends her time calling out to the other dogs on the block.
Daisy, my ironically named orchid, has passed on due to overheating.
I felt better for all of three days. Grandpa hit the shutter release for me because I have managed to lose my remote.

I learned how to draw with Soft Pastels for Drawing in Color class
I expressed myself in collage form for that same class using my photos and song lyrics. (Tears of a Clown and Mad World)
I finished a Drawing project in one class session, basing it off of Monet's style and JMW Turner's painting.
The friend whose maternity photos I took had her baby. Yay!!!
And, finally...

Today, I had a stalker. He watched me that intensely for over 5 minutes. The little creep.

Otherwise, I have attended more doctors' appointments than classes, begun physical therapy, gone through withdrawal from medications, come down with a sinus infection that's currently plaguing me, spent an entire day with my grandfather at the hospital, been told I am a carrier of a blood disorder, and (holy cow, GOOD news) been informed that I am an Honor student. Now I am going to be observed for two different sleep disorders this week. Life is... something. On the plus side, I've begun a tutorial that may very well become a small e-book for you all that explains (as thoroughly as I possibly can) the Photoshop toolkit.

Thank you for hanging in there with me. I pray I don't let you down again. :-(

Sunday, April 24, 2011

Faces Contest Votes, Anyone?

I know that I haven't been keeping up with my blog for the past couple of weeks, and I'll explain why and post my photos when I am ready to, but for now, I'd like to cut to the chase.

I have submitted two series entries into the Faces Photo Contest, open to all photographers of any skill level. If you're interested, entries are priced as such:

SINGLE ENTRY: $35 per image
SERIES: $50 per series
STUDENTS: $20 (single OR series)


My Series entry into the Self Portrait Category is:


My Series entry into the Environmental Portrait Category is:

If you like these images, please vote for one of them under the People's Choice section. You are allowed one vote per e-mail address, so if you have multiple addresses, feel free to show some love! I'd truly appreciate it. The direct voting links are as follows:

Self
Photo 1: Moment of Weakness
Photo 2: Camouflage My Sadness
Photo 3: Fool the Public

Environmental
Photo 1: Miss C Takes a Breather
Photo 2: Mr. L Weighs His Options
Photo 3: Miss K Makes An Offer
Photo 4: Mr. D Takes a Gander
Photo 5: Miss S Has a Look


Thank you so much if you do spare a moment of your time to vote for me. :) If not, at least thank you for still following me here.

Thursday, March 10, 2011

Portfolio and A Ditch

Oh, what a creative title.

My image for yesterday: BW Film Photography Portfolio-- Lines. Click for full size.
I spent 8 hours printing yesterday. Can you believe that?! EIGHT HOURS! That, my friends, is why I was not up to posting by the time I got home. Eight hours left me with a plethora of prints that were not perfect but were very decent, so I'm going to sell them for different prices depending on their quality at the art show on Friday. Yay! However, the above prints turned out perfectly (the scanner wasn't doing a very great job, so just take my word for it LOL), so they shall be my eight portfolio photos. The professor himself chose all but the first and last one, so I'm hoping for an A- or so. Maybe. *nervous mode* I can't believe this is due tomorrow already. ARGH!

Alright, enough of that.

Today's challenge was to take a photo featuring water in some way, so I headed down the street. With all the rain we've had lately, there was bound to be some water, right? Here's my shot in my preferred crop:


However, Sandra liked the flowers better and suggested this crop:


I find this amusing because we had such conflicting tastes when it came to this photo. Believe it or not, I detest flowers. I don't know why, but I do. They're great to photograph sometimes, but I just don't want to look at them very often. I favored the rock and the water on the left side of the photo instead, but figured the flowers would add some contrast and interest. Sandra, on the other hand, could do without the rock and the water and is a big fan of flowers. Most people-- normal people-- probably do.

That brings me to my somewhat photographically irrelevant question for you. What would you prefer: a rock, water, or a flower?

For Sandra
The competition. AKA the result of my practicing blurred water motion. Note to self: 1/10 is not slow enough! Use the tripod.

Monday, March 7, 2011

The Bokeh Challenge

f/5.3, 1/160 sec, ISO 640, 42 mm

Sandra challenged me to try her bokeh method, so I busted out the Christmas lights and wrapped them all over a bunch of champagne glasses that were sitting out on the table like they were just waiting for me. It was a lot of fun, but I definitely need more practice.

f/5.3, 1/30 sec, ISO 640, 48 mm
I didn't feel like editing today, so I cropped these photos to 5x7s and slightly burned the edges. Otherwise, this is what they looked like in-camera.

f/5.6, 1/100 sec, ISO 640, 55 mm

Sunday, February 20, 2011

Sleepy Sunday

Even my butterfly house is sleepy.

I can't seem to wake up today. It was a perfectly fine day, though. Ran into some technical difficulties, but what's new? I wanted to take some more photos outside, but the weather went nuts and we got some crazy hailstorm mixed with giant, scattered snowflakes and a small amount of rain.


Then, Sandra gave me the idea to try taking a selfie version of her photo and grunge it up using a tutorial she found, but none of the windows in my house were reflecting me no matter what I tried. I wonder if I'm part vampire. ;)

Finally, I gave up and tried photographing some things in my room, but I was dissatisfied with every shot, so I spiced up one of them and a portrait of my grandmother with this tutorial that Sandra linked me to (we were bored today. Can't you tell?). Here are the results.


Lastly, Sandra linked me to this interesting tutorial and I had to try it out, so this is what I got.


Creepy, huh? Well, now that I've scared the bajeezus out of you (or just bored you to death), I bid you goodnight!

Monday, February 7, 2011

Sow's Ear, Anyone?


I spent the day re-editing photos from an old shoot. By the time I got tired of doing that, I had an absolutely ridiculous time trying to actually TAKE any photos, so I ended up with this sow's ear of a file. Hopefully, I got a silk purse out of it, but I'm still debating.

I attempted to salvage this photo using an "action" (it's actually a psd) Sandra asked me to make for her . She has appropriately named it "She's Blushing", but you'll have to see what the action was intended to look like to understand the name. I'll be uploading the psd to my deviantART account as soon as I get to a place with better internet than mine so that you all can enjoy it too. :-)

Until then, I'll share with you a few of the old photos I've working on. Models are two out of three of my best friends since middle school, Kelly and Khalila. I met them when I was 12, and today I turn 22. Time flies!!!


Wednesday, February 2, 2011

Recess Over

Alright, guys, I'm so sorry for being this late. I was playing! It was a cruddy day for reasons I'll explain later, and Sandra decided to let me play with some of her old photos of my beautiful best friend Khalila. It really cheered me up (thanks, Sandra!). This is a bit of what came out of it.


After regular processing, I used the same filters as my harlequin photos to give these pictures a completely different feel just for kicks.

Speaking of the harlequin photos, they show up in yesterday's shot!

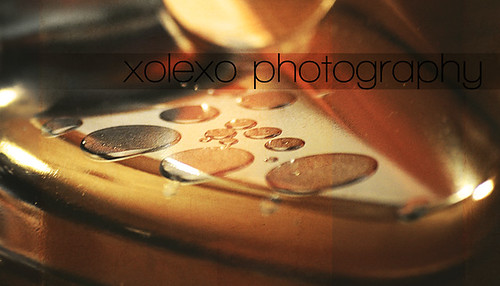
Taken with the Minolta x-700
One of the first things you'll probably notice about the photo is that it's extremely contrasty. That brings me to the reason that the day was less than pleasant for me: my two rolls of 36-exposure film were damaged nearly past the point of salvation.

First, the lab ran out of fixer, then it ran out of fixer remover-- neither of which would have happened had the employee with the keys to the stock room bothered to show up for work today--, so we had to improvise when it came to chemistry.

Next, the timer in my darkroom went haywire midway through developing. Naturally, there were no more timers. Again, I had to improvise.

Then, when my film was finally done washing, I noticed that some of it was extremely gray, and other parts were almost completely clear. Come to find out there was a CRACK in my film canister. The film was getting exposed to light throughout the entire developing process.

I'm sad to say that these were not even close to the only problems I had in the darkroom today. However, I tried to make due, and now I am sure I'll be able to salvage most of my film on Thursday with any luck.

Definitely need some luck. LOL

This morning's quick attempt at filling the frame before class.

Saturday, January 22, 2011

Prints, Edits, and Stripes


I took this photo a few days ago with my awesome new  High-Def  Panoramic Fisheye Lens (for the millionth time, THANK YOU SANDRA! *hug*) and somehow completely forgot about it. Came across it today while cleaning out a card and couldn't leave it behind. Hope it was worth it. :)

Now, today's challenge was to feature stripes somehow, so here are my photos for the day.

Wind chime from my bedroom window, using my 55-200 mm lens.

My poor, abused guitar by my other bedroom window. Today was all about daylight!
Finally, I will show you my terrible school prints, starting with the most overexposed: my dog, Ursa.


I've got a LOT of learning to do. Maybe next week will be better! *fingers crossed*


Wednesday, January 19, 2011

Selfie


Oh, how I hate self-portraits. I always want to do them, but then once I do, I hate every photo. Blegh.

Anyhow, you can probably expect to get some macro tomorrow, as Sandra bought me a macro fisheye lens I've been wanting. I'm so excited!!! (For the hundredth time, THANK YOU, SANDRA!)

On top of that, I also learned how to print my negatives today (yay!) and my grandmother found me a Save the Tatas breast cancer shirt, so it's been an awesome day. Now to go fall into bed! :D

Friday, December 31, 2010

Worn 80s Ad Tutorial


Sandra asked me to use her photo (check it out here) to create a tutorial for an old 80s advertisement look, so of course I hopped on the chance. I promise you, this looks a lot longer and more complicated than it actually is. Just stick with it! :) It's meant for novices, hence the wordiness.

Open your file (of course).


Copy this photo and paste it over the photo. If it is smaller than your photo, just resize it until it is much larger.


Move the newspaper layer until the words are in a desirable position.


Double-click this layer, and under "Blend Mode:", change Normal to Multiply. Then, lower the Fill Opacity (NOT the Opacity) to a very low number. I used 6%. Press OK.


Under the Layer section, scroll down to Layer Mask and click Reveal All. This layer mask will allow you to "erase" parts of the layer without permanently losing it. Instead of using the erase tool, you use the brush tool on black to erase. If you wish to replace the erased information, just paint back over that area with a white brush.


Using a large soft, round brush, paint over your subject to remove disturbing areas of the texture. If you mess up a little, don't worry! Remember, you can paint white to put it back.


Next, click Layer -> New Fill Layer -> Solid Color...  and click OK on the pop-up. Now choose a grey color that you'd like to be your hue. I used d0d0cc.


Again, double-click the new layer and set the Blend Mode to Multiply. This time, leave the Fill Opacity alone.


Create another Solid Color fill layer, click OK, and choose a more reddish dark color. This is going to be the color of shadows in your photo, so make sure it's not too light. If you do make it too light, you can always fix it. In my case, I used 150f0f.


Double-click the new color and set it to Screen.


Now we get to the fun part: Brushes and textures. I personally look for these all over the place, but for this, I have used the "Paper Works" brush from 500ml. You can use any wrinkled paper brush you want for this effect.


First we're going to create a new layer. You can do this however you want. I simply type ctrl+alt+shift+N. Then, with your brush color set to black and your size larger than or the same size as your image, click over the photo.


Set the brush layer to Overlay.


Just to give the picture a tiny bit more texture, push ctrl+alt+shift+N again and ctrl+alt+shift+E. This will create a new layer that looks exactly like everything under it. It's called a stamp.


Under Filter, click Artistic and Plastic Wrap... Make your Highlight Strength very low (2 or 3), your Detail high (I used 11), and Smoothness very low (1-3). Don't worry about what this is doing to your subject. If it doesn't look alright, you can mask away the new highlights over the subject. Press OK.


Make another stamp and burn the edges of the photo however you want to make a vignette.


[OPTIONALClick on the Background layer and press ctrl+J or Duplicate Layer. Drag that layer to the top.


Making sure that your background color is set to white, go to Filter -> Distort -> Diffuse Glow. Graininess should be 0, Glow Amount medium (11 in my case), and Clear Amount medium (8 for me). It'll be different for every photo. You just want enough glow to make the edges of your subject fuzzy and white . Press OK.


Set that layer to Linear Dodge at Fill Opacity 10% or lower.]


Lastly, make a stamp of the finished product, double click it, and under Blending Options, click Gradient Overlay. Make the gradient diagonal with a gray on one side and white on the other. Set the Blend Mode of the Gradient Overlay to Color at around 58%. Press OK.


[OPTIONAL: Add text in a sans-serif bold font such as Eras Bold ITC and change the color to a midtone from the photo.]


Flatten your image and save it. You're finally finished!