Showing posts with label minolta x-700. Show all posts

Thursday, March 10, 2011

Portfolio and A Ditch

Oh, what a creative title.

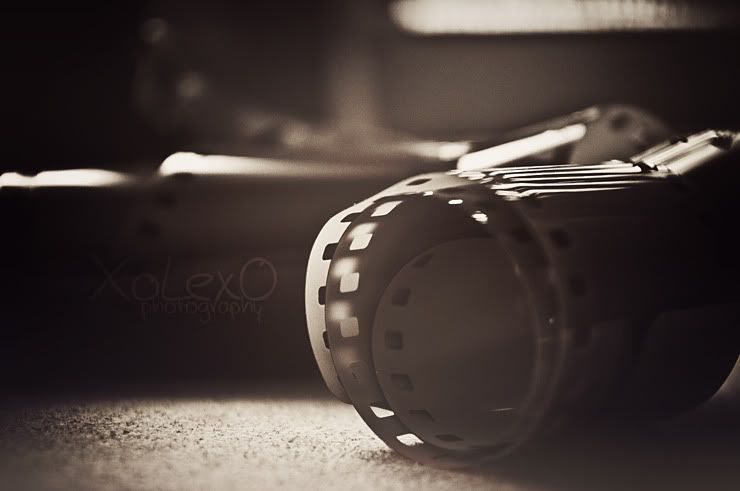
My image for yesterday: BW Film Photography Portfolio-- Lines. Click for full size.
I spent 8 hours printing yesterday. Can you believe that?! EIGHT HOURS! That, my friends, is why I was not up to posting by the time I got home. Eight hours left me with a plethora of prints that were not perfect but were very decent, so I'm going to sell them for different prices depending on their quality at the art show on Friday. Yay! However, the above prints turned out perfectly (the scanner wasn't doing a very great job, so just take my word for it LOL), so they shall be my eight portfolio photos. The professor himself chose all but the first and last one, so I'm hoping for an A- or so. Maybe. *nervous mode* I can't believe this is due tomorrow already. ARGH!

Alright, enough of that.

Today's challenge was to take a photo featuring water in some way, so I headed down the street. With all the rain we've had lately, there was bound to be some water, right? Here's my shot in my preferred crop:


However, Sandra liked the flowers better and suggested this crop:


I find this amusing because we had such conflicting tastes when it came to this photo. Believe it or not, I detest flowers. I don't know why, but I do. They're great to photograph sometimes, but I just don't want to look at them very often. I favored the rock and the water on the left side of the photo instead, but figured the flowers would add some contrast and interest. Sandra, on the other hand, could do without the rock and the water and is a big fan of flowers. Most people-- normal people-- probably do.

That brings me to my somewhat photographically irrelevant question for you. What would you prefer: a rock, water, or a flower?

For Sandra
The competition. AKA the result of my practicing blurred water motion. Note to self: 1/10 is not slow enough! Use the tripod.

Wednesday, February 2, 2011

Recess Over

Alright, guys, I'm so sorry for being this late. I was playing! It was a cruddy day for reasons I'll explain later, and Sandra decided to let me play with some of her old photos of my beautiful best friend Khalila. It really cheered me up (thanks, Sandra!). This is a bit of what came out of it.


After regular processing, I used the same filters as my harlequin photos to give these pictures a completely different feel just for kicks.

Speaking of the harlequin photos, they show up in yesterday's shot!

Taken with the Minolta x-700
One of the first things you'll probably notice about the photo is that it's extremely contrasty. That brings me to the reason that the day was less than pleasant for me: my two rolls of 36-exposure film were damaged nearly past the point of salvation.

First, the lab ran out of fixer, then it ran out of fixer remover-- neither of which would have happened had the employee with the keys to the stock room bothered to show up for work today--, so we had to improvise when it came to chemistry.

Next, the timer in my darkroom went haywire midway through developing. Naturally, there were no more timers. Again, I had to improvise.

Then, when my film was finally done washing, I noticed that some of it was extremely gray, and other parts were almost completely clear. Come to find out there was a CRACK in my film canister. The film was getting exposed to light throughout the entire developing process.

I'm sad to say that these were not even close to the only problems I had in the darkroom today. However, I tried to make due, and now I am sure I'll be able to salvage most of my film on Thursday with any luck.

Definitely need some luck. LOL

This morning's quick attempt at filling the frame before class.

Friday, January 28, 2011

Worn


To be perfectly honest, I took this photo a few days ago, but never really got around to editing it. It wasn't until I came across this wonderful action that I knew what kind of look I wanted. Now the photograph is just how I feel today: Worn.

Class went great. I focused my attention on learning the things I needed most immediately, so I didn't get very many prints, but the few that I actually DID finish were "perfect" according to the professor. At least technically, anyway.


However, I have no photos to show for today until next week because every picture I took was with the SLRs. Lessons learned:

1.  Always wear two pairs of gloves when shooting outdoors with SLRs in the winter.
2.  Do not wear a cap in a darkroom.
3.  Always make sure that you have at least 1 frame left out of 24 GB worth of memory cards.
4.  Enjoy every minute of your learning experiences.
:D 

Saturday, January 22, 2011

Prints, Edits, and Stripes


I took this photo a few days ago with my awesome new  High-Def  Panoramic Fisheye Lens (for the millionth time, THANK YOU SANDRA! *hug*) and somehow completely forgot about it. Came across it today while cleaning out a card and couldn't leave it behind. Hope it was worth it. :)

Now, today's challenge was to feature stripes somehow, so here are my photos for the day.

Wind chime from my bedroom window, using my 55-200 mm lens.

My poor, abused guitar by my other bedroom window. Today was all about daylight!
Finally, I will show you my terrible school prints, starting with the most overexposed: my dog, Ursa.


I've got a LOT of learning to do. Maybe next week will be better! *fingers crossed*


Friday, December 31, 2010

Worn 80s Ad Tutorial


Sandra asked me to use her photo (check it out here) to create a tutorial for an old 80s advertisement look, so of course I hopped on the chance. I promise you, this looks a lot longer and more complicated than it actually is. Just stick with it! :) It's meant for novices, hence the wordiness.

Open your file (of course).


Copy this photo and paste it over the photo. If it is smaller than your photo, just resize it until it is much larger.


Move the newspaper layer until the words are in a desirable position.


Double-click this layer, and under "Blend Mode:", change Normal to Multiply. Then, lower the Fill Opacity (NOT the Opacity) to a very low number. I used 6%. Press OK.


Under the Layer section, scroll down to Layer Mask and click Reveal All. This layer mask will allow you to "erase" parts of the layer without permanently losing it. Instead of using the erase tool, you use the brush tool on black to erase. If you wish to replace the erased information, just paint back over that area with a white brush.


Using a large soft, round brush, paint over your subject to remove disturbing areas of the texture. If you mess up a little, don't worry! Remember, you can paint white to put it back.


Next, click Layer -> New Fill Layer -> Solid Color...  and click OK on the pop-up. Now choose a grey color that you'd like to be your hue. I used d0d0cc.


Again, double-click the new layer and set the Blend Mode to Multiply. This time, leave the Fill Opacity alone.


Create another Solid Color fill layer, click OK, and choose a more reddish dark color. This is going to be the color of shadows in your photo, so make sure it's not too light. If you do make it too light, you can always fix it. In my case, I used 150f0f.


Double-click the new color and set it to Screen.


Now we get to the fun part: Brushes and textures. I personally look for these all over the place, but for this, I have used the "Paper Works" brush from 500ml. You can use any wrinkled paper brush you want for this effect.


First we're going to create a new layer. You can do this however you want. I simply type ctrl+alt+shift+N. Then, with your brush color set to black and your size larger than or the same size as your image, click over the photo.


Set the brush layer to Overlay.


Just to give the picture a tiny bit more texture, push ctrl+alt+shift+N again and ctrl+alt+shift+E. This will create a new layer that looks exactly like everything under it. It's called a stamp.


Under Filter, click Artistic and Plastic Wrap... Make your Highlight Strength very low (2 or 3), your Detail high (I used 11), and Smoothness very low (1-3). Don't worry about what this is doing to your subject. If it doesn't look alright, you can mask away the new highlights over the subject. Press OK.


Make another stamp and burn the edges of the photo however you want to make a vignette.


[OPTIONALClick on the Background layer and press ctrl+J or Duplicate Layer. Drag that layer to the top.


Making sure that your background color is set to white, go to Filter -> Distort -> Diffuse Glow. Graininess should be 0, Glow Amount medium (11 in my case), and Clear Amount medium (8 for me). It'll be different for every photo. You just want enough glow to make the edges of your subject fuzzy and white . Press OK.


Set that layer to Linear Dodge at Fill Opacity 10% or lower.]


Lastly, make a stamp of the finished product, double click it, and under Blending Options, click Gradient Overlay. Make the gradient diagonal with a gray on one side and white on the other. Set the Blend Mode of the Gradient Overlay to Color at around 58%. Press OK.


[OPTIONAL: Add text in a sans-serif bold font such as Eras Bold ITC and change the color to a midtone from the photo.]


Flatten your image and save it. You're finally finished!