Monday, May 16, 2011
Wishes at Rest
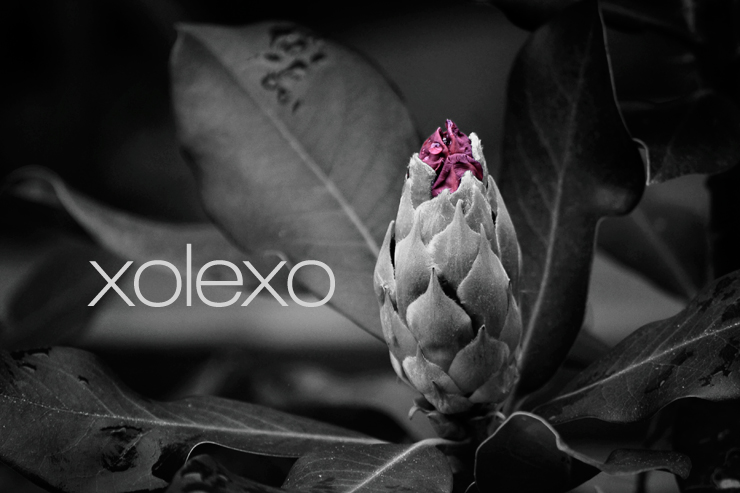
Today I felt like playing with two different methods of color splashing. For this photo, I took one in color and then converted it to BW in-camera. In photoshop, I placed the rectangles over the BW version, pasted the colored version on top, and created a clipping mask. The only other editing done was to Auto Contrast the two photos and add in the tag/quote. Sharpening was done in-camera. :-)
The bottom one is the usual kind of color splash, but again both versions of the photo were made in-camera. I hope you enjoy today's photos.
Labels:
55-200mm,
blue,
bokeh,
color splash,
cool,
droplet,
flash,
flower,
Nikon D5000,
plant
Sunday, May 15, 2011
"WHERE'D YOU GO?!"
That's probably what you guys are asking. Well, I have almost literally gone nowhere, and I am now officially making my return to my 365 Challenge.
I owe you guys 32 photos, but today I will only post a few that I took over the long hiatus. Sandra and I have decided that it would be best to tack the days onto the end of the year instead of posting all of the photos I took or neglected to take since (1) I must definitely say I did NOT take a photo every single one of those days, though I did take one most of them, and (2) I have been extremely sick, and by the time I get well enough to make up for the missed photos, I will have a ridiculous amount of photoshoots to work on.
Let me catch you up a little.
And, finally...
Otherwise, I have attended more doctors' appointments than classes, begun physical therapy, gone through withdrawal from medications, come down with a sinus infection that's currently plaguing me, spent an entire day with my grandfather at the hospital, been told I am a carrier of a blood disorder, and (holy cow, GOOD news) been informed that I am an Honor student. Now I am going to be observed for two different sleep disorders this week. Life is... something. On the plus side, I've begun a tutorial that may very well become a small e-book for you all that explains (as thoroughly as I possibly can) the Photoshop toolkit.
Thank you for hanging in there with me. I pray I don't let you down again. :-(
I owe you guys 32 photos, but today I will only post a few that I took over the long hiatus. Sandra and I have decided that it would be best to tack the days onto the end of the year instead of posting all of the photos I took or neglected to take since (1) I must definitely say I did NOT take a photo every single one of those days, though I did take one most of them, and (2) I have been extremely sick, and by the time I get well enough to make up for the missed photos, I will have a ridiculous amount of photoshoots to work on.
Let me catch you up a little.
![]() |
| Ursa has finally stopped looking for Roxy and now spends her time calling out to the other dogs on the block. |
![]() |
| Daisy, my ironically named orchid, has passed on due to overheating. |
![]() |
| I felt better for all of three days. Grandpa hit the shutter release for me because I have managed to lose my remote. |
![]() |
| I learned how to draw with Soft Pastels for Drawing in Color class |
![]() |
| I expressed myself in collage form for that same class using my photos and song lyrics. (Tears of a Clown and Mad World) |
![]() |
| I finished a Drawing project in one class session, basing it off of Monet's style and JMW Turner's painting. |
![]() |
| The friend whose maternity photos I took had her baby. Yay!!! |
![]() |
| Today, I had a stalker. He watched me that intensely for over 5 minutes. The little creep. |
Otherwise, I have attended more doctors' appointments than classes, begun physical therapy, gone through withdrawal from medications, come down with a sinus infection that's currently plaguing me, spent an entire day with my grandfather at the hospital, been told I am a carrier of a blood disorder, and (holy cow, GOOD news) been informed that I am an Honor student. Now I am going to be observed for two different sleep disorders this week. Life is... something. On the plus side, I've begun a tutorial that may very well become a small e-book for you all that explains (as thoroughly as I possibly can) the Photoshop toolkit.
Thank you for hanging in there with me. I pray I don't let you down again. :-(
Sunday, April 24, 2011
Faces Contest Votes, Anyone?
I know that I haven't been keeping up with my blog for the past couple of weeks, and I'll explain why and post my photos when I am ready to, but for now, I'd like to cut to the chase.
I have submitted two series entries into the Faces Photo Contest, open to all photographers of any skill level. If you're interested, entries are priced as such:
SINGLE ENTRY: $35 per image
SERIES: $50 per series
STUDENTS: $20 (single OR series)
My Series entry into the Self Portrait Category is:
My Series entry into the Environmental Portrait Category is:
If you like these images, please vote for one of them under the People's Choice section. You are allowed one vote per e-mail address, so if you have multiple addresses, feel free to show some love! I'd truly appreciate it. The direct voting links are as follows:
Self
Photo 1: Moment of Weakness
Photo 2: Camouflage My Sadness
Photo 3: Fool the Public
Environmental
Photo 1: Miss C Takes a Breather
Photo 2: Mr. L Weighs His Options
Photo 3: Miss K Makes An Offer
Photo 4: Mr. D Takes a Gander
Photo 5: Miss S Has a Look
Thank you so much if you do spare a moment of your time to vote for me. :) If not, at least thank you for still following me here.
I have submitted two series entries into the Faces Photo Contest, open to all photographers of any skill level. If you're interested, entries are priced as such:
SINGLE ENTRY: $35 per image
SERIES: $50 per series
STUDENTS: $20 (single OR series)
My Series entry into the Self Portrait Category is:
My Series entry into the Environmental Portrait Category is:
If you like these images, please vote for one of them under the People's Choice section. You are allowed one vote per e-mail address, so if you have multiple addresses, feel free to show some love! I'd truly appreciate it. The direct voting links are as follows:
Self
Photo 1: Moment of Weakness
Photo 2: Camouflage My Sadness
Photo 3: Fool the Public
Environmental
Photo 1: Miss C Takes a Breather
Photo 2: Mr. L Weighs His Options
Photo 3: Miss K Makes An Offer
Photo 4: Mr. D Takes a Gander
Photo 5: Miss S Has a Look
Thank you so much if you do spare a moment of your time to vote for me. :) If not, at least thank you for still following me here.
Labels:
55-200mm,
brown,
church,
City Methodist,
hard light,
harlequin,
high contrast,
high school,
Indiana,
Louis,
Nikon D5000,
portrait,
sandra,
self,
stripes,
tear,
white,
winter
Friday, April 22, 2011
Template Tutorial: Part 2
Last time, I taught you how to make a very simplistic, basic template using shapes and clipping masks. Now, it's time to spice it up!
Find a texture that you really like and place it over the background layer. I chose this texture by DyingBeautyStock because it seems universal enough for my needs.
If you want to change the color of the texture, you can use whatever method you want. Personally, I'm going to use the non-destructive method of adding a Solid Color fill layer over the texture in whatever color I want and setting its blending mode to Hue. That way I can change the color again any time I want in the future.
Add a layer mask to the rectangle layer. (Layer -> Layer Mask -> Reveal All) Use an interesting brush-- in my case, a grunge brush-- that is black and set to 100% Opacity to brush away the side in whatever fashion you please. Diagonally tends to be most interesting. Vary the opacity and the brush itself to make a fun, unique edge. Don't lose too much, though! You don't want to lost your background photo. If it helps, you can hide the overlapping layers so that you can see more of what you're doing.
Experiment with this method on the other three shapes too, but take care to remember not to mask too much away. Keep your black brush's opacity low.
Just for fun, I'm going to add a thin rectangle across the bottom to add sort of a ribbon effect.
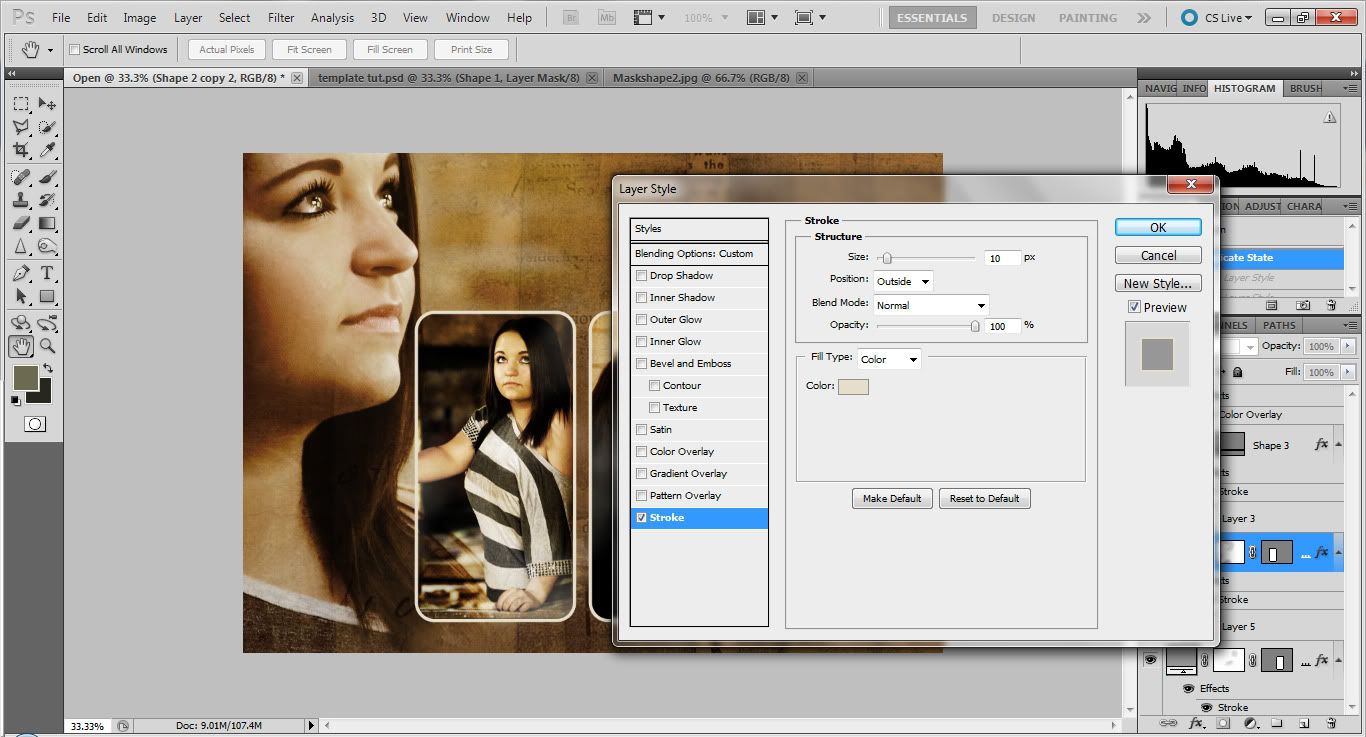
The rest is up to you! Embellish where you want, adding borders or text or even other little shapes to make the template your own. I personally recommend changing the layer styles so that the photos and the background texture will match better. In my case, I changed the blend mode of the main shapes to Hard Light and then added a border called a Stroke to everything, including the ribbon.
I also changed the ribbon's blend mode to Darken and darkened the edges of the whole thing by creating a new layer, using a soft black brush to paint over the edges, and then changing the blend mode until I was satisfied. Here is my finished product minus text.
Remember that text follows the same basic rules as photos: play with the blending options and don't be afraid to experiment with Strokes!!! You can get some very interesting results.
Labels:
55-200mm,
brown,
church,
City Methodist,
Indiana,
Nikon D5000,
portrait,
template,
texture,
tutorial
Wednesday, April 13, 2011
Template Tutorial: Part 1
The key to making a template is to make everything impermanent. It may be a challenge, but there's always a way to make a change temporary in Photoshop. You just have to find loopholes!
A template starts with a blank white or black canvas. I started mine with a 5x7, 300 px resolution white canvas because 5x7 is a nice, standard photo size that can easily be changed to either 8x10 or 4x6.
Let's begin with something simple. Using your rectangle tool, make a shape that covers roughly three-fourths of the canvas in the opposite color (for instance, I have a white canvas, so I'm making a black rectangle.)
Now, make another shape in gray. This can be any shape you want from the Photoshop presets. It should be between half and two-thirds the height of the canvas and however wide as you see fit. You can always change the size as we go. Place it where you think a photo would look nice.
Use Ctrl+J or Command+J to duplicate the layer twice. Line the three objects up so that at least two overlap your black rectangle. Look! We already have some sort of design. This is technically already a generic starter template.
ADDING PHOTOS
Place your photo over whichever shape you want it to occupy. Resize as needed.
With your cursor on the line between the photo and the shape layer, hold down your Alt key and click the line. This is called creating a Clipping Mask. The photo will only show up where the shape is. you can move the photo around to get the correct placement.
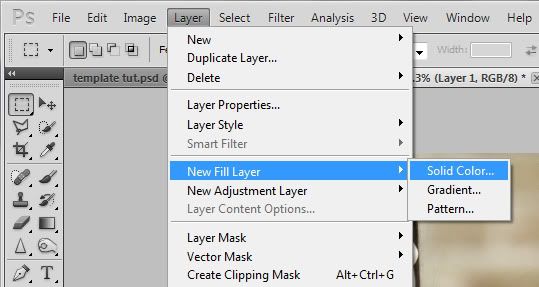
From now on, any changes you make with the shape layers will be applied to the photos. For instance, if you change the gray layers to "Hard Light", the photos will appear to be set to Hard Light although they are still normal photos. You can change the Blending Options any time you want.
Part two will come soon enough. For now, experiment with this method. Make your own different starter templates, and show me what you do! :)
Labels:
55-200mm,
City Methodist,
high school,
Indiana,
Nikon D5000,
portrait,
template,
tutorial
That Time of Year Again
Yay, Spring! It was such a beautiful day, I had to spend a few hours basking in the sun on my lovely back porch. While I was sitting there, I thought I'd take a few snapshots from my seat. :)
I'm meeting with the local pro photographer tomorrow between my classes to get some insight on the local scene and how to get into the business. It should be a learning experience! I'm really looking forward to it.
In other news, I've decided to enter the PDN Faces Photography Contest for kicks. I'll be entering my harlequin series (there are more than I posted here) under the Self-Portraits category and portraits I took in the multiple City Methodist church under the Environmental Portraits category. When they're all re-edited and ready for uploading, I'll be sure to post them here. If you're thinking about entering, I'd love to see what you submit!
Now, I shall FINALLY post part one of the template tutorial. I've been putting it off for a day when I was alert enough to at least understand my OWN tutorial. haha, Today's the day. Hope you get something from it!
Tuesday, April 12, 2011
Fiddling
Yesterday, I was practically avoiding my computer. I'm really burnt out with all this editing. It's just school, eat and edit, edit, eat and edit, sleep poorly due to nightmares, and then start the whole process again. It's a charmed life, a great life, but it's hard on my eyes and my wrists, especially when I'm this sleepy all the time. So I decided to play with some paper and rubber cement once I finished doing some schoolwork. Apparently I'm not very good at it. LOL
Anyhow, I'm exhausted and hoping that tomorrow I'll cheer up. Or at least that tonight I will get some horror-free sleep!
Monday, April 11, 2011
Meh. Who Cares?
![]() |
| Look what I found in my yard today. |
Alright, I honestly don't feel like even being near this computer today, and it doesn't feel like anyone's paying attention anyway, so...
Sunday, April 10, 2011
Pup Pup Pweez Come Home
My darling dog is back on her feet and wanted to enjoy the fresh air, so we gave her a long overdue bath and let her hang out on the back porch.
![]() |
| SOOC |
![]() |
| SOOC again, different lens. I thought the flare was interesting. She's still looking for Roxy. :( |
The weather today was wonderful. We spent the day riding around and sitting on the back porch.
![]() |
| SOOC yet again. It's almost that time of year!!! |
While we were out, we went to Best Buy, where my grandparents decided to buy me the best photo printer in the place. It's made specifically for photography, and I am in love with it. It's wonderful!!! So of course I printed like crazy today. On the other hand, I haven't been on the computer much. These are a couple of the photos I managed to edit. Hope you like them!
A Little Retro, A Lot of Makeup
I was in the mood to have a little fun. What can I say? Hopefully someday I'll actually finish editing all the photos I took over Spring Break and I can get to playing with photos like this.
Anyhow, I have officially decided to give you the template tutorial in parts because it's going to take way too long and be way too confusing otherwise. The first part will be posted tomorrow or so. For now, I'm ready to pass out. Goodnight!
Subscribe to:
Posts (Atom)