
Last night I was asked, "How the hell do you get your photos so sharp?" To that, I answered that the Nikon D5000 has some awesome Shooting Mode settings, but also that two particular Photoshop tools are my best friends: Unsharp Mask and High-Pass. If you don't know what those are or how to use them, you're looking at the right post.
I've been using Photoshop since the early years of high school, and people told me to always make sharpening the last step in your post-processing. I beg to differ. There is no such thing as "always" in Photoshop. Sometimes you need to sharpen an image a bit before you get started, and other times you don't even realize that an image needs sharpening until well after you thought you were finished (as is the case here). Don't ever take things as rules. Anything you're taught is just a guideline. You make your own rules as you go, then break them as you find new things to do.
 |
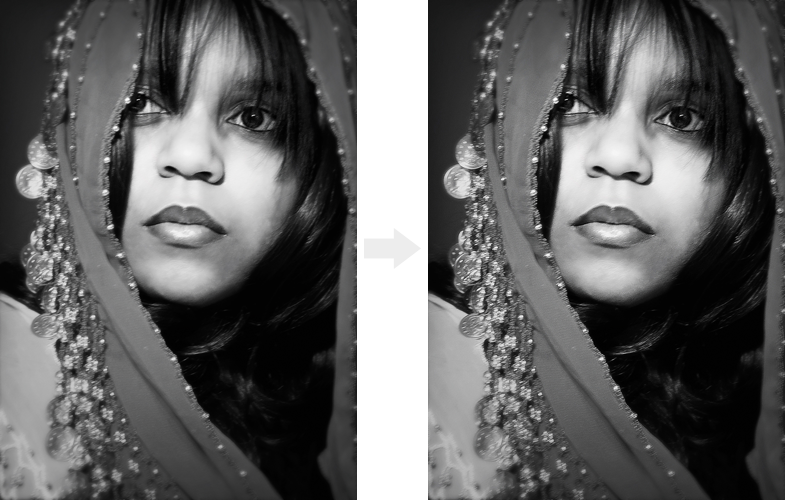
| The original, blurry image I posted here last week or so. |
Tip #1: Making your image slightly smaller or even shrinking it to the exact size you'll need it will make the sharpening process work best.
I resized my image to 1000 px wide for this exercise.
Duplicate your background layer.
Ctrl+J, Command+J, Layer > Duplicate Layer, or right-click the background layer and click "Duplicate Layer..."
Ctrl+J, Command+J, Layer > Duplicate Layer, or right-click the background layer and click "Duplicate Layer..."
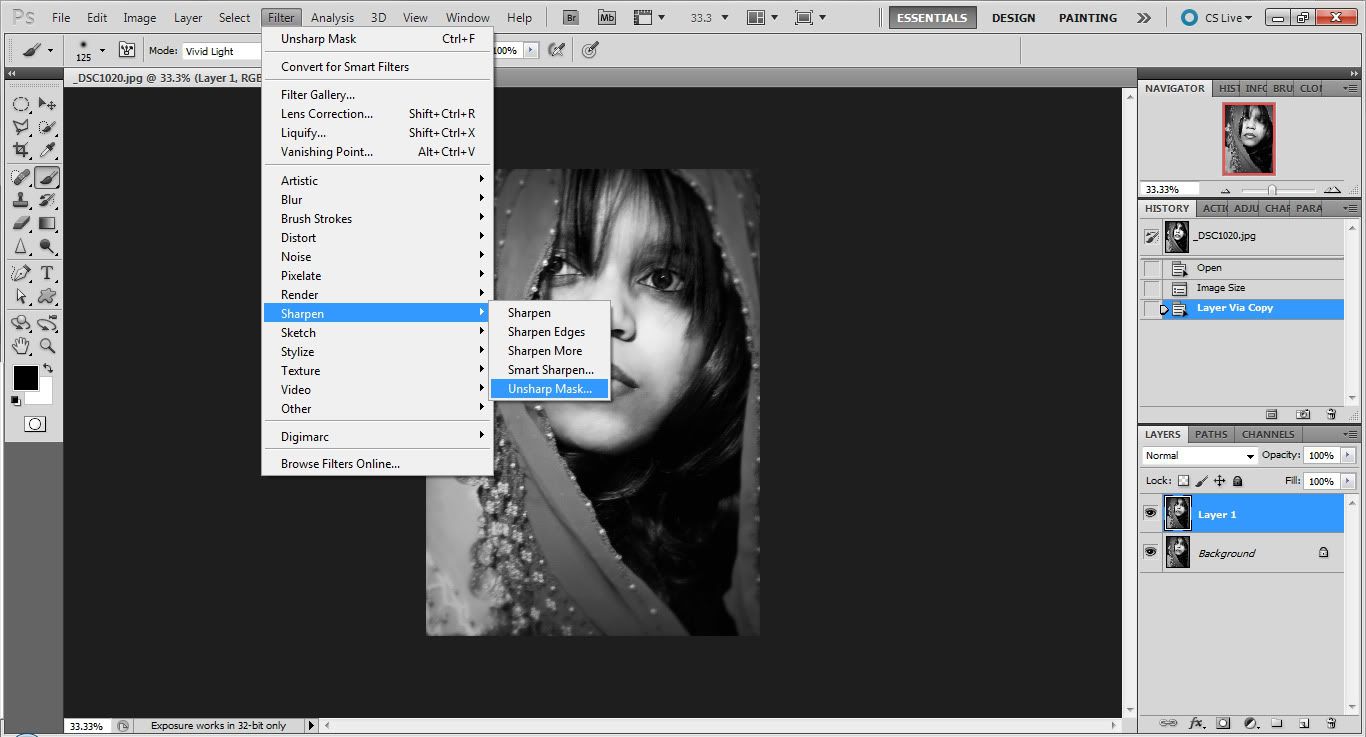
With your new Layer 1 selected, go to Filter > Sharpen > Unsharp Mask.
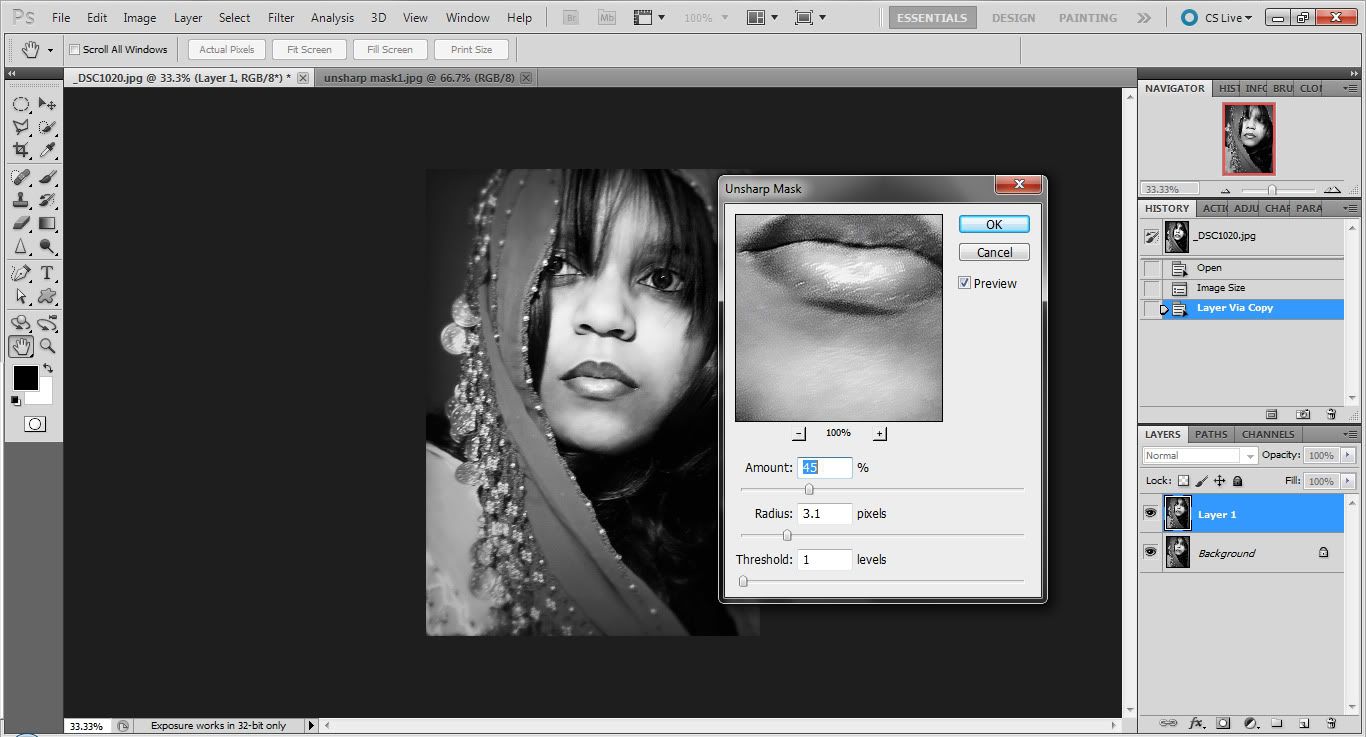
"Threshold" determines how many pixels you are sharpening at a time. I normally keep this at 1 so that every single pixel is getting sharpened evenly. Otherwise, you can sometimes get inconsistent and strange spots that are still blurry.
"Radius" and "Amount" will change for every photo. The radius will change the contrast in edges. The higher the radius, the bigger the dark line around edges. If you make the radius too big, you'll either make that dark line way too noticeable or make the photo far too contrasty. Start with a low number around 3 pixels and tweak it as you please. I used 3.1 px.
The amount is the most important part here. The blurrier your pic, the more sharpening you'll need. Play around with it and the radius until you find a balance that you like. I used 45. Press OK.

Tip #2: Turn the sharpened layer on and off by clicking the little eye next to it so that you can see the difference between the original image and your new image. If you feel you've sharpened too much, just lower the opacity of the sharp layer until you like it.
Change the Blend Mode of your Layer 1 to Overlay, Soft Light, or Hard Light. (Any will work.)
Double-click the layer and change the "Blend Mode", or click the drop-down menu in your LAYERS panel and change it from Normal to one of the aforementioned modes. I usually use Overlay.
Double-click the layer and change the "Blend Mode", or click the drop-down menu in your LAYERS panel and change it from Normal to one of the aforementioned modes. I usually use Overlay.
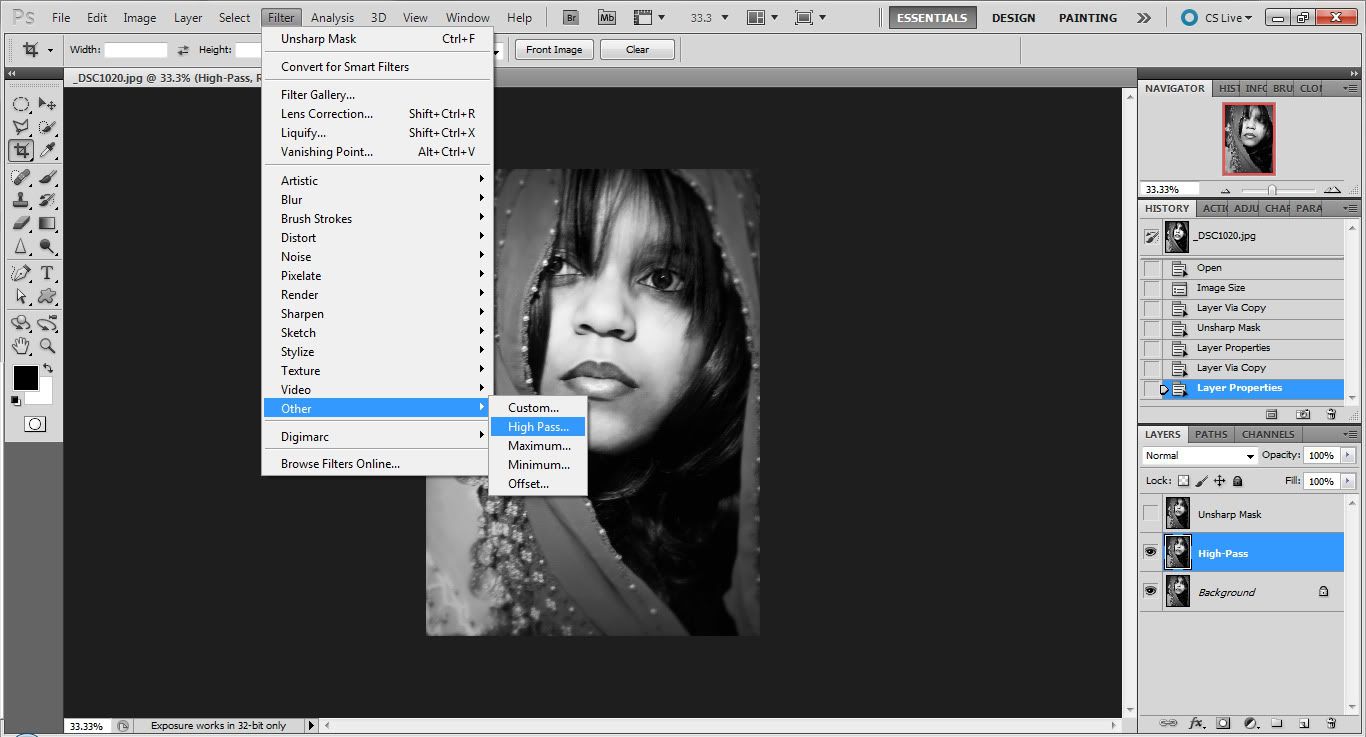
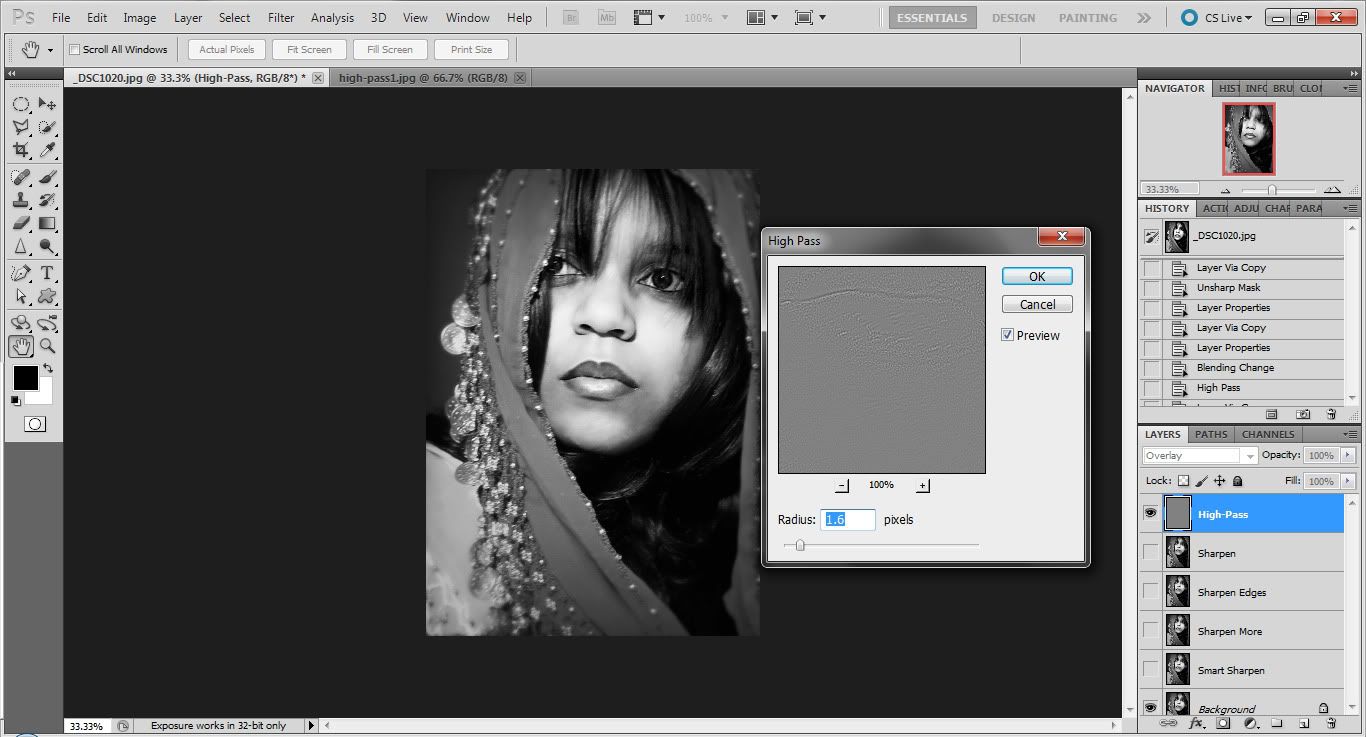
Don't worry about how it looks right now. Go to Filter > Other > High Pass.
You'll see your image change to some semblance of what it was originally, but it may be clearer now or even TOO sharp. The High-Pass filter sharpens any edges it "sees", leaving out any noise or grain that may be in the photo unless it is prominent. For this reason, it is ideal for portraits but terrible for photos taken at a high ISO. It will sharpen the grain in night-time photos because it sees grain as edges, but since portraits are typically taken with low ISOs and large apertures, grain is small enough that the High-Pass filter does not see it.
Move the Radius slider until you are satisfied and Press OK. See Tip #2.

Tip #3: Erase or mask away (see previous tutorials to learn how to use Layer Masks) parts of the sharpened layer that may get overdone if you have areas that need more sharpening than others.
For instance, I almost always get rid of some of the sharpening on skin, but not on edges. You don't want to emphasize all those pores and wrinkles!
The Other Methods
Filter > Sharpen > your choice
All of the other options are great for quick fixes. You can click Sharpen and it may be perfect, or if it's not quite enough, Undo and click Sharpen More instead. If you just want to give your edges a little bit of a boost, choose Sharpen Edges. If you don't feel ready for Unsharp Mask or High-Pass, experiment with Smart Sharpen.
The down side to these options is that you have little control over the results. Normally, I find that the Sharpen tool doesn't do nearly enough for large images and that it does way too much with small images. Sharpen Edges does nearly NOTHING for large images. It's best for small images. Sharpen More has never once been satisfactory for me personally. Admittedly, I have little experience with Smart Sharpen since it's a relatively new feature to Adobe CS.
 |
| The final product. |
I hope this has helped you!
No comments:
Post a Comment